2015/12/19

Happy Holidays!

Hi!

This time we're wishing you happy holidays a little in advance. We've realized that our time is a lot better spent working on the actual game at this point, rather than on events and such. If we do end up creating something more holiday-related, we'll post later, but for now, enjoy the morph target and lip-sync test video of Sal (we didn't have any song ideas for Beat yet).


We have separated the detailed facial animation (rendered in Blender's Cycles render), and the full body animation. The full body one is less detailed, it mostly just uses major keyframes, jumping from one major pose to the other. This is only to see what his movement style would be like.

All of this was made in about 3 days (and the face took another 3 days to render....), and it helped us a lot in adjusting morph targets, and getting a general idea of Sal's style.

Speaking of animations...
Sketchfab finally added morph target support (even for stupid ones like ours that are bone-based)! We tried uploading Beat with a bunch of her animations, to check it out:

You can see the list of animations by clicking on the button next to the seeker bar.Our only remaining issue is not being able to use Beat's eyes (which are texture based), so she just stares into nothingness.

We hope you still like it!

2015/11/17

Tutorial: Baking normal (and other) maps in Blender


It's Geril. Hi, all!

As I looked back on our previous posts, I realized I promised to make more tutorials about UDK and game development in general. The reason why we didn't make any is because it's hard to teach what we are still learning. But I'd like to share something that I think not many people know.

Blender3D can bake many kinds of textures, so we don't need ZBrush, 3D Coat or Blacksmith to create materials (even tileable ones). But as Blender is a free software, we have to work twice as hard.

I'm trying to make this tutorial as in-depth and easy to understand as possible, because I tend to omit important parts. If I'm wrong about something, please tell me in the comments, you know that I'm still learning, too.


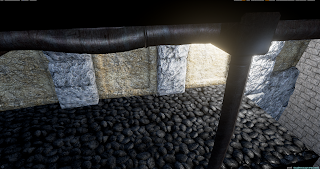
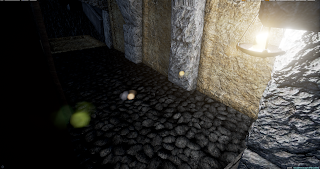
So, in this tutorial, we're going to show you how we create tileable materials; in this case, a cobblestone surface. This is the result, rendered in Unreal 4:


This tutorial is only for the normal, displacement and ambient occlusion maps. In theory, anything can be a color map, we're using one that is a general stone texture we use for many other things.

---


First, launch Blender (we're using 2.76 right now) and delete the starting box. Then add a Plane mesh using the Add menu [SHIFT + A] - this is going to be the surface to which we are projecting our texture. We're using the upper right area of the editor as a UV/Image editor, of course you can use any other area, too.


Press [TAB] to go into the plane's mesh edit mode that has all of the vertexes selected by default. Press [U] and select Unwrap from the menu - you just created a UV map for the plane. You can see it in the UV/Image editor area. This is where your texture will appear after baking.

In that area, create a new image in the image menu. Choose the right resolution for your texture, based on how important it is going to be in the game. We use 2048x2048. The color and name parameters are not important.


Exit the plane's edit mode [TAB], and add [SHIFT + A] an ico sphere (this will be the first stone). Push [G] and then [Z] to move it along the Z axis above the plane. Push [S] to re-size the sphere, shrink it to the size of the stone you want, relative to the texture's size (the plane).


Using the [NUM 7] key, you can switch to a top-down view, and using [NUM 5], you can change the perspective to orthographic (this is very important if you want to be precise!). Go into the sphere's edit mode [TAB], make sure all the vertexes are selected (if not, use [CTRL + L]).You can randomize the sphere by clicking randomize on the left toolbar. You can adjust it further in that menu, but I find it easier to just repeatedly push the randomize button until I am happy with it.

Open the specials menu with [W]. You'll find a "Smooth" option, with that, you can smooth your randomized sphere so it looks more like a rock. Once again, you can adjust it in the left-side menu, or just keep smoothing it over and over. With this method, you can randomize rock easily. (I add the other rock this way, too) Move your rock to one of the corners, I moved mine to the lower right. To move the mesh on the grid, hold down the [CTRL] key, that way you can align it perfectly with the corner.


Duplicate the rock with [SHIFT + D], and put a duplicate in each of the corners using the grid. Create some new ico spheres, and make new rocks from them using the previous method. Select some rock with area selection [C] (if you didn't select all the vertexes of a mesh with [C], push [CTRL+L] to select the remaining vertexes on them as well), and arrange them as a group, re-size them [S], rotate them ([R] to rotate on the current view's axis, [R] again if you want to rotate them on all the axes).

Duplicate them, and to make it more random, set the pivot point to Individual Origins, so that when you rotate or re-size them, they will all rotate and re-size individually (not as a group). Just make it seem as random as possible, customize them, but it's important that, except for the rocks in the corners, no other rock should touch the plane's edges.


Pick a group of rocks, preferably one that is roughly as wide as it is long. Place it to one edge of the plane, so that it touches the rock in the corner and goes off the edge a bit. After that, duplicate it and place the duplicate on the opposite edge, using the grid. The easiest way is, say you want to move them from the left side edge to the right side one. You'd use grab [G], and to move them on the X axis, push [X] after [G]. Then just type in "-2". This moves the group two units on the X axis - right onto the other edge of the plane. For the top and bottom edges, of course you'd use [Y] instead of [X], for the Y axis. Do this for every edge, the point is that you should fill all the opposing edges with the same models, so that in the end it becomes tileable. It's a little tricky and tedious, and requires a lot of patience, but if I could do it, you can, too.


After our rocky surface is done, and there are no holes remaining, exit edit mode [TAB] and move it to about one unit above the plane. Then duplicate it, and move the duplicate a little closer to the plane (it still shouldn't touch it!). You should also rotate the duplicate 90 degrees ([R], [Z], 90 - this shortcut rotates it on the Z axis 90 degrees) Another important thing is to set the rocks' flat shading to smooth on the left side toolbar.

Select the two rock objects and the plane, in this order; the plane should be the last one [SHIFT + Right Mouse Button] for multiple selection). In the Properties section on the right side, choose the photo icon - that is the Render tab. There you can find the Bake sub window, where you can adjust the bake settings. First, check "Selected to Active" and "Clear". Margin can be left on 16, but I've had bad experiences with margins and tiling, so I recommend setting it to about 4. Set Bake mode to Normals. Now let's bake!


Well now, if the rendered image doesn't look healthily blue, but rather greenish or orange, our Plane's surface points in the wrong direction. In this case, go to the plane's edit mode, select all of the vertexes, and look for a "Flip Direction" button on the right-side toolbar. That should flip the plane's direction. Select the rocks and the plane in the right order, and try again. It should look normal now (pun intended). If you're happy with it, you can save it in the UV/Image editor window with Save as Image, I recommend saving as either PNG or TGA. When you've saved it, let's go back to baking - select Displacement in the Bake menu, and Bake again.


You shouldn't have trouble with the plane's direction again if the normal map came out good. Just bake it and save it next to the normal map you created. After that, repeat the process for Ambient Occlusion as well. You can do a little touch-up in Photoshop or GIMP, like filling in holes between rocks, but be careful, and always keep the original file. You can set the contrast higher on the Displacement map though, it makes the material look deeper. (Don't mind the Hungarian stuff on the pic)


Let's import the pictures into Unreal 4. Select one of the imported pics, and make a material based on it. Put the remaining pictures in that material as well. Use something appropriate as a color texture. Using the color texture as a DetailNormal map is also a good idea. 


This is the last step, messing around with the material settings. It's a little hard to explain this in text, I hope that the picture is understandable. I'll try to write the instructions down as best as I can, though, because I'm not that lazy.

Connect the Displacement's red output to a BumpOffset node [B], then duplicate it and repeat. Create a TexCoord Node [U], and set it to U:2 and V:2. Connect this to the second BumpOffset Coords node's input. Connect the first BumpOffset node's output to the inputs of the textures we created. The second BumpOffset node (with the TexCoord) should be connected to the color texture, and its detailnormal map.

Multiply [M] the Displacement map with the rock texture. Connect this to Basic Color. If it's too dark, leave out the multiply node, but I think it improves the visuals quite a bit. Our normal map would be boring on its own, so you should also add the color map's detailnormal to it (multiplying its texture coord so it becomes more dense).

Create a BlendAngleCorrectedNormal node (that's a fancy way of saying MAKE A MORE DETAILED NORMAL) (okay.. there is a reason why it's called that, but.. let's just continue, okay?) Put this node next to the normal maps. Connect our baked Normal map to Base Normal, and the DetailNormal's to AdditionNormal. Connect this fancy node to the Normal input. And finally, connect the Ambient Occlusion's output to...... the Ambient Occlusion input. Yes, there is an easy step in this.

All that is left is to save the material and try it out. You should adjust the BumpOffset, Roughness and Specular, but I can't help you there, it all depends on what looks good with the color map and environment you are using.

---

This wraps up the tutorial. If you have any questions or requests, leave them in the comments below! I'll be happy to create a tutorial on anything, as long as I know what I'm doing.
2015/11/07

Mini-update: Multiplayer!

Hey!


We're screwing around with multiplayer right now. Geril's Beat and I'm Cole. Moving around works, but I'm still learning about client-side and server-side stuff - most of the functions don't work on the client side because of that. So, WIP.


...which is nice.

But because pushing each other with puppets isn't much fun, we're making the fighting system next.

2015/10/31

Happy Halloween!

You can view our Halloween 3D comic here:


No Rest for the Wicked by ProjectOL on Sketchfab

Can you find all the hidden secrets?

We spent a huge amount of time working on this comic alone (more than half of October). It's not our best comic, and has as much to do with Halloween as a rotting pumpkin in the morning sunlight. Anyways, we tried.

Because no one is going to find the hidden things in the comic (and our previous comics...), I'll just tell you outright: There are hidden things. There are invisible things. Use the view settings to find them.

Working with a deadline (because of the contest) meant that we frequently missed sleep and any other opportunities that came up - no free time, no social life. We planned way too big for such a short time. I can't really say it was worth it, because the comic is rushed. More time could have led to a better quality comic, and better overall mental and health condition for the two of us. Needless to say, we didn't win anything. (if we did, maybe I wouldn't feel like I wasted half a month of my life)

We remade all four of our characters for this, as you could see in the previous post. Eslie really needs to be redone, the mesh has been through a lot of engines and changes, and at this point, it's more of a mess than a mesh. So we're going to redo her as soon as possible.

Blender has been especially cruel to us, causing random errors, not saving morph targets and such. Exporting and uploading to Sketchfab took us maybe 6 hours in total. (midnight - 6AM)

Sorry about the tone, lack of sleep doesn't exactly make me a happy person.

This is our last comic for a while, because the large amount of time we spent on this could have been better used on actually developing the game. We will continue making comics in the future, but for now, we're working on a playable demo.


Cheers, spooks, ghosts, whatever goes today-

And 'Happy' Day of the Dead for those of us not celebrating Halloween (Visiting graves and mourning instead of trick or treating? ...niiiice)

2015/10/27

Ready for Halloween?

We've entered Sketchfab's Halloween contest, and we're working hard on our entry.
Wish us luck! Here are our characters in their glorious Halloween costumes
(these models will be featured in our upcoming 3D comic):

2015/10/08

Progress, hard work!

Hey!

We are properly progressing in the development of Project OLP, FINALLY. This week we got lots of things done, like equipping and picking up weapons, and playing proper animations on slopes (and slowing down and speeding up according to the slope's angle). Also we're working on a new map.

Here are some pics and gifs:

The map


Slope blendspace:


Weapons


See you next time!

2015/09/28

September update!

Hi!

In this update, there actually is a lot to say.
Last week I (Lussy) started learning and making blueprints. As we are finished with all characters, Geril is progressing decently with the environment, so with though it would be best if I did Blueprints next to modeling. As a result, our game is finally starting to look/play more like a game - even more so than it did in Unreal 3.

Here is a video in which we demonstrate what we achieved up to now:


I still have a lot to learn about Blueprints, but I think I'm starting to get the hang of it. If I get more comfortable, we may try to make some tutorials. But for now, here are some of the features I added:


Sliding


Falling from a height

Walljumping

Stopping after sprinting

Some gifs of the test maps:

The sandstorm


 Inside the "house"

 
 Sal cloth test:


Also, we were interviewed by Sketchfab! You can check the article out here.

That's all for today! Look forward to more updates, more game mechanics, and more comics!

***BONUS***

 WTF moments:


After the video...


2015/08/30

Finally: The fourth player character!

Hi!

Guess what! We're finished with all of our player characters, at last. Introducing Sal:


He's a stout, and he's the most playful and light-hearted of the characters. He loves collecting things, so he occupies quite a lot of space during their adventures.
Since all of the main characters are done, we are going to get started on building levels, along with making all the animations the characters need for movement. (Geril's doing most of the animations, I (Lussy) am doing the background objects so I can get better at 3D modeling)

We also tried out Sketchfab's new feature: uploading animations! This feature is going to come in handy, because this way, we don't have to make videos to show you guys animations, and you can even rotate the models while watching. A big thanks to all of Sketchfab's staff for making our life easier!

You can view the animation here:


2015/07/29

The 3rd playable character: Beat!

Hi!

It's been a long time, again. We've been working hard on creating the remaining two player characters. The first one to be completed was the Beatrice, the mouse:


She's not the best fighter, but she's into science and medicine. You've already seen her in a comic, but now she finally has a 3D body, too.

We were experimenting with her hair for quite a while before we got to this point. We mostly used hair meshes until now, so making strands work properly was something new. Unreal 4 helped with that. The other challenge was the tail: it still appears a bit... crooked. It's not broken though! It just needs a lot of bones...
For the skin texture, I tried out Blender's texture paint for the first time, and it made texturing a lot easier. I only did touch-ups in Gimp, when it was almost complete. (By the way, Geril did the 3D model and textures for the clothes, Lussy made the face and body textures, where skin is showing)


(These in-progress pictures were made with Blender's cycles render)

We were working on the two remaining characters simultaneously, so this means you can look forward to seeing the final character really soon! After that, we can hopefully concentrate on game mechanics and level design. I'm especially looking forward to making multiplayer work.


Until then!

2015/06/08

3D comic #2!

Hey!

Here is the second 3D comic we made:


I think for now we'll stick with these (as they are more convenient to make and we are low on team members), but you can expect more traditional comic strips somewhere in the future.

This comic gives you more information about Cole's character. We were experimenting with sound effects (written, of course), 3D text, camera angles and facial expressions. There are some other things, too - I wonder if you'll be able to find them!

About the project; we're moving forward, slow but steady. I (Lussy) am working on textures, which means the two playable characters that only existed in drawings will soon be ready for animating and then importing into Unreal 4. Geril's doing the comics and other models while I'm messing around with the textures. Alex is still knee-deep in the engine itself (IKs! Yaaaaaaaaay).

Until next time!

2015/05/09

3D comics!

Hi!


We spent a lot of time doing a new type of comic on Sketchfab. You have to click through the annotations to read it properly. Like this, in the lower-right corner:


We recommend full screen to see it better.

On non-widescreen (4:3) monitors, you may not be able to see all of the text, because we optimized the comic for widescreen monitors. You can move the camera with the right mouse button to see all the bubbles.

Enjoy!


2015/04/30

Sketchfab!

Spring already!

We spent the Easter holidays (and the rest of the time, too) working. All of the 4 characters are slowly becoming functional, and we’re discovering more and more possibilities in Unreal 4 (though it already killed one of our laptops…).

Alex is working on a pickup system that is going to be very important in the game, as the players will be switching weapons frequently. We have two functional characters so we can also begin to test the local multiplayer elements soon. (And there will be a video of it.)

About the comic… It’s really late, we know. It’s going slowly because the 4th character’s design is still being worked on. But we joined Sketchfab, so in the meantime you can look at our 3D models in all their glory!

Other ones will be uploaded to: https://sketchfab.com/carpaintergeril

2015/03/24

March update

Hi! I'm Lussy.

...It's been a while..
I got home from Korea a little while ago, so I'm still jetlagged and grumpy. But being there helped my mental health a lot, so now I'm ready to dive into work again. ...I mean, I would be but I have a few months of school left, so until I graduate, I don't think I'll have much time for anything... Finals. Sigh.

So while I was away and wasn't paying attention, Geril found a REAL programmer for our project. An actual programmer who can actually program AND actually DOES program. Not procrastinate. So yeah! As I still have very little grasp on what's going on, I'll just let our new programmer tell you how the project's doing. If everything works out though, I'll be able to switch back to the role of a designer and texture(/3dmodel/background/everything else related) artist soon. And I'm really looking forward to that.

***


Hi! I'm Alex,

I'm the new programmer for this project. I can also help out with German and Italian translations if we decide to include them in the game.

I hope you'll like the videos we make about the game, its features and maybe some of its funny glitches. I joined this project because I liked the story behind it and I want to be a part of this 'game-dev-gamers' team.

What I'm working on right now is some basic movement, and functions for blueprints. I'm still trying to get used to Unreal's hierarchy.

Hopefully with me on the team the rest of us don't have to get involved in the blueprint madness too much, so we can speed up the project a little bit.

What I aim to work on soon, but still don't know how exactly, are some grab functions and fluid character movement to make the gameplay look awesome.
I hope you will enjoy my videos and updates on the project.

***

PS: March's comic may be a little late, but it's already in process,
PPS: It looks like we'll be migrating to Unreal 4.

2015/02/27

Unreal 4!

Hi!

This month is a little crowded.

We are happy to say that we managed to get hold of Unreal Engine 4 for a while (thank you, GitHub!!). So these days we are trying out the engine, discovering the differences, etc. There are lots of built-in stuff in UE4 that we would have needed in the UDK. So we're looking at the pros and cons, and considering migrating our project. We're not sure yet though. I have yet to check out the blueprint system in-depth. (By the way, scripting is so much quicker with the graphical interface and in-engine compiler. No more restarting while adjusting a variable. Yay!)

Here are some pictures for comparison! Every texture and mesh is the same as they were used in the UDK. Only minor changes at most.

Left side - UDK, right side - UE4


---


Super detailed bump maps! Yay!


Geril created this "building" in about 15 minutes.


Real-time reflections make everyone look like T-1000s in liquid metal form

If we do decide to migrate the project, we'll make some tutorials.

I'm sorry to say that there may not be a comic this month at all. Geril is hard at work at his full-time job, and in UE4 too, and I (Lussy) am traveling in South Korea at the moment. I hope you can understand.