Showing posts with label unreal 3. Show all posts

2015/02/27

Unreal 4!

Hi!

This month is a little crowded.

We are happy to say that we managed to get hold of Unreal Engine 4 for a while (thank you, GitHub!!). So these days we are trying out the engine, discovering the differences, etc. There are lots of built-in stuff in UE4 that we would have needed in the UDK. So we're looking at the pros and cons, and considering migrating our project. We're not sure yet though. I have yet to check out the blueprint system in-depth. (By the way, scripting is so much quicker with the graphical interface and in-engine compiler. No more restarting while adjusting a variable. Yay!)

Here are some pictures for comparison! Every texture and mesh is the same as they were used in the UDK. Only minor changes at most.

Left side - UDK, right side - UE4


---


Super detailed bump maps! Yay!


Geril created this "building" in about 15 minutes.


Real-time reflections make everyone look like T-1000s in liquid metal form

If we do decide to migrate the project, we'll make some tutorials.

I'm sorry to say that there may not be a comic this month at all. Geril is hard at work at his full-time job, and in UE4 too, and I (Lussy) am traveling in South Korea at the moment. I hope you can understand.

2015/01/24

Movement test!

Hello!

Here's a video for you:


Just a quick update on how we're doing. As you can see, we're experimenting with different controls: a fixed, side-scrolling camera with 3D movement. It works out pretty well. The only awkward thing about it is how sometimes you can't determine where you are in the 3rd dimension. We're planning to fix this with a small circle of shadow below the player, and a more dynamic camera.

P.S.: Subwoofer required for full experience

2015/01/10

Tutorial: Introduction to Unrealscript

Hi! This is Lussy.

It's been a while since we posted a tutorial. It's time for another one.

I’ll try my best to help you get started with Unrealscript. Don’t worry if you know nothing about scripting: I don’t know anything about other programming languages either! High five!

As a first step, I recommend downloading Notepad++ (here). It’s a simple, easy-to-use software with lots of functions. You’re going to use this to write your scripts. I also suggest you download UnCodeX (here). It will help you immensely. With it, you can browse all the classes in your script folders (a class is a file of script. Classes can be found here: UDK/Development/Src). You need to configure it first, though.
These two software are all I use for scripting (besides the Internet). Oh, and of course, the UDK, but I assume you already downloaded and installed that. Let’s get started then.

If you plan on making a completely custom game, you need to start with a new gametype. I’ll show you how you can create one.
First, you need to decide what kind of game you want. If you want a shooter very similar to Unreal Tournament 3, you can base your scripts off of the UTGame gametype. If you want something entirely different, I suggest you start from scratch: SimpleGame. If you want something in-between: UDKGame. It has some useful functions, but it isn’t as advanced as UTGame.
It is important that you don’t base your game on something you’ll never use: you’ll only make it harder for yourself. The biggest challenge for me is not writing scripts, but understanding all the scripts that already exist. Of course this might not be the case for you. If you’re not sure, just experiment, try out the gametypes on a sample map and decide which is the closest to the game you want to create. You should only choose one, if you try to mix and match, it will lead to disaster (not the good kind. What I mean is that it will not work.). Once you’re done:

Create a new folder for your scripts. Name it something you’ll recognize. Recommended: Make up a short ‘identifier’ for your classes. In my case, this is OLP. All the files you create should have these letters in the front, so you can find them and refer to them easier. I’ll use TG for this tutorial (TutorialGame). Create another folder inside the one you just created and name it "Classes". Create the following empty files inside your "Classes" folder (you can simply open a new file in Notepad++ and save them inside your folder by the name „TG … .uc”, it will take care of the extension):

-TGGame.uc
-TGPlayerPawn.uc
-TGPlayerController.uc


These are the only ones you need for now. The Game class kind of holds your whole gametype together and defines the rules. The PlayerPawn class defines functionality of your pawn: your player(character). The PlayerController class contains (mostly) the rules by which you can move your player character.

Next, you’ll need to have them extend from the gametype you chose. You can do this by editing the previously created files, like so:

TGGame:
class TGGame extends SimpleGame;

TGPlayerPawn:
class TGPlayerPawn extends Pawn;

TGPlayerController:
class TGPlayerController extends PlayerController;


This makes them extend SimpleGame. It's important to note that the class name inside the file must match the file's name.


For UDKGame:


TGGame:
class TGGame extends UDKGame;

TGPlayerPawn:
class TGPlayerPawn extends UDKPawn;

TGPlayerController:
class TGPlayerController extends UDKPlayerController;


For UTGame:


TGGame:
class TGGame extends UTGame;

TGPlayerPawn:
class TGPlayerPawn extends UTPawn;

TGPlayerController:
class TGPlayerController extends UTPlayerController;


Now that you’re done, you need to tell the engine to read your scripts when compiling (Compiling = the compiler reads your scripts and converts them into „machine code”). You need to insert a line into the „DefaultEngine” ini file. You can find it here: UDK/UDKGame/Config/DefaultEngine.ini


Find this line: "[UnrealEd.EditorEngine]". This is the part that shows the compiler which scripts to compile. Insert the line "+EditPackages=TutorialGame" after the other ones. Save and quit. 


You’re almost done: Open Unreal Frontend. ( UDK/Binaries/UnrealFrontend.exe ). 


You will find the compile and full recompile buttons there. I recommend you do a full recompile this time, just in case. You won’t need to do this every time, the compiler detects if a script folder has modified files and it will only compile that folder. (If you get random errors or UDK decides to crash randomly or not even start up, do a full recompile. This will inevitably happen sooner or later.)
So, hit full recompile. It will take a few seconds to finish. After it is finished, you can check the log to make sure your files were found and compiled. 


This was an easy step. It will get harder though. The compiler log is the place where all the errors will be displayed. Like this:


If you get an error, the compiler won’t compile further until you fix the error. Warnings won’t stop the process, but you should still fix those, too.

So now your gametype is ready. You can try it out, but at the moment, it won’t differ from the gametype you extended from. This is the tricky part of Unrealscript: the classes are all part of a tree. They all start from Object.uc. This structure, the extending, lets you use all the functionalities of the classes before yours, without having to define them again and making a huge mess. This also means that you’re going to have to know the content of the classes before yours to use them effectively. I suggest you take a tour in UnCodeX. You’ll get an idea of where everything is.

I should mention that scripting is a very tedious process (personal experience), and you will feel like giving up, especially if you never did anything like this before. You need a lot of patience and practice to do well. I stayed up so many nights, fixing errors and glitches and they all made me furious. You just have to remember your goal (like in my case - if I don't do it, nobody will).

I hope this was helpful to you. I plan on making other tutorials as well that will help you actually modify your gametype. Until next time!


If you want to see our other news, check our Facebook and DeviantArt!

2014/11/30

Story time!

Hi! We're going to share some information about the game's world. It's going to be a bit technical so bear with us. The next story post will be focused on the actual story and the characters.
So... here we go.

The story takes place on Koronite, a world made up of irons. Along with this iron based world there are other kinds of matters on the surface which make life possible. Water is rare to find, clean water even more so as the seas contain lots of iron mixed in with mercury.

Magnetism is what makes the continents, mountains, air and water move. The planet has such a high voltage that it could shatter on its own, but the energy is contained by resistors (gigantic natural poles).


The atmosphere is slowly eating away the hills and mountains by oxidising them. Millions of undiscovered minerals lie hidden deep inside the planet’s inner layers among with organic living irons.

The reason why life is possible in this world is because of the plants as many of them are able to extract iron from the air as well as other sources and incorporate them. They then give off the materials they don’t need -  the ones that are needed for humans to live.


The life forms here are either based on iron or have evolved to survive in this environment. The people living on Koronite essentially adapted to the planet, their bodies able to process some of the iron. As such, they are heavier and sturdier but they regenerate less and more slowly. Their fur is strong but prone to rust if it’s not taken care of regularly. Breaking one of their bones may take tonnes of force but once broken, it stays that way. They can also have parasite-like irons consuming their bodies, or living with them in symbiosis. 

The planet tries to get rid of outsiders on a daily basis, these are the more recent inhabitants who haven't evolved to process iron, yet they are determined in surviving at any cost.

The surface is varied. In some places the ground is hot and sandy, elsewhere it is cold with crumbled metal. There are endless oceans that look like large mirrors and also seemingly never-ending are the chasms, floating mountains made of dust and slowly moving damp cubes of metal.


While life is everywhere in its own stubborn form, the inhabitants are fighting an endless war against nature using steam and sparks. After centuries they can finally say the surface is theirs. The problem is, the surface is not the only layer the world has.

Before conquering the surface life only existed deep below it. The creatures were primitive and less able to adapt to changes. Their large bodies remained as caves between the layers of the planet. As it moved and changed, the surface became more stable than the other layers. Water carved long caverns that became the home of simple and more complex creatures alike. So while the surface keeps changing, under it, chaos is the only natural order.

The average inhabitant stays far away from the deeper levels - they have enough trouble on the surface already - yet there are people who use the caves to remain hidden, to do things under everyone’s feet. They have to fight other creatures or nature itself for these places, so it isn’t very common.


About one and a half centuries ago, it became forbidden in most regions to work, develop and transport under the surface. Only mining could be continued and even that was kept under close supervision. Recently there have been revolts across the world. Leaders came and went, laws faded and became rewritten. Nations changed names and conquered new lands.


These new, neutral areas of land - or as their inhabitants called them, “free terrains” - were captured by hired mercenaries. Without a flag or a name the conquered lands could become inhabited to form a new nation of their own.

In this unstable world, to survive, beggars can't be choosers.

Our protagonists’ lives start out from the village in the valley of Maron.
They separate for a while after but their past and goals ultimately causes their paths to collide soon enough.


names not final

2014/11/01

Post-Halloween post!

Happy Halloween!

Here's a video that we just made (still warm). Prepare for spookiness!
You can see a brand new map and lots of new foliage and effects. We realised we focused solely on gameplay mechanics, so the environments.. kinda sucked. So we were working on creating foliage. And we're showing them off right now. Enjoy!


Here are some bonus pics of the map in daylight. You can see the foliage better this way.


P.S.:

It took us about 8 hours to export the frames from UDK, then convert them into a video, then convert that video, then edit it, and then export the edited video (the first edited export took 3 hours. Turned out it was 4:3, small and disfigured. The second export took about half an hour. It was also edited twice.) And THEN it turns out that the quality is faaar worse than the original exported images. Comparison:


So if we ever have the patience to try video editing again, maybe we'll fix it. But right now, we just want to take a break from this weeklong, nonstop video preparing and editing.

P.P.S.: At least the vid is 60FPS though.

2014/10/16

Morph targets!

Hi! It’s Lussy.

We’ve been messing around with the facial morph targets of the bobcat, and we tested how well they could be converted into the UDK. So Geril made a short video of the bobcat lip-syncing to a song that, in his opinion, best suits his (yet non-existent) voice. It is a very basic test, so there is little to no animation playing on the body. The focus is on the face. First take a look at the one captured in Blender:


And this one was captured inside the UDK:


Here's another comparison:


As you can see, the UDK one is a lot weaker than the Blender one. We're working on changing that.

See you next time!

2014/06/27

Some plans

Hi!

A lot of you (..the few people who sometimes read this blog) don't understand what the game is going to be like. So we'd like to make this clear: we're making a sidescrolling cooperative game in which you explore huge dungeons in groups of 4 or less, fight monsters and enemies and do quests. We'll leave the rest for later. For now, here are some of our most recent plans and ideas:


(don't tell anyone! ;) )

2014/04/23

Maps and control

Hi!

We're constantly working on the game's controls, and also on a map so that we can test the controls. We drew a sketch for a map structure, and we already made it functional in the UDK. So, here you go: enjoy the sight of the player character jumping around in a sketch, in a textbook, within a wonderful, low-FPS gif. If it loads.


(Next time the quality's going to be better, I promise.)

Apart from the sketch, we made another simple map, without a real structure, to see how the environment would work with the control mechanics. The design is very basic. We only have a few world objects, that's why it doesn't have any detail and looks kind of boring. We'll be working on those later.

Here are some pictures of the map:


2014/01/01

Happy New Year!

We wanted to post a drawing this time, but we are working on the first gameplay video, so we'll just show you a screenshot of the level as it is right now.

2013/12/10

Fennec fox

Hello, it's Lussy.

In this post, I'll introduce one of our more important characters, the fennec fox. Designing and creating her is mostly my job.

The fennec fox is a merchant who has a shop. She's about 30-40 years old, concentrates mostly on business and money, and the thing she's most fond of is her gun. She will occasionally hire fox, and in some parts of the game, she'll act as fox's sidekick, occasionally helping him out, but mostly just doing her own thing.


Her technical specifications will be the same as fox's: a regular and a cinematic model.


Thanks for reading, have a nice day!
It is still undecided, but she might be controllable in the game at some point.

2013/11/05

Tutorial: Making "cheap" grass, from Blender to UDK

Hi, I'm Geril, and in this tutorial I'm going to show you how to make a static environment object in a step by step tutorial using Blender and the UDK. In this case the object is a patch of grass.

First, we need a mask. A mask is a black and white image on which white means visible, and black means invisible. The image should have no grey, only black and white. The one I'm using is 512*512 pixels. (Unreal 3 only recognizes binary numbers for resolution. So: 64*64, 128*128, 256*256, 512*512, 1024*1024, 2048*2048)
Other than the mask, you also need a diffuse texture that shows on the surface of the grass. Right now I'm using one that isn't an actual grass texture, but of course it's better to create your own or select one from the UDK's files.

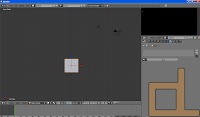
Open up Blender (v2.63 is what I'm using). In the 3d view the first thing you see is a cube that Blender loads on startup. We don't need this cube so you can delete it. The basic controls are: middle mouse button for rotating the view, and shift + middle mouse button for moving the camera.

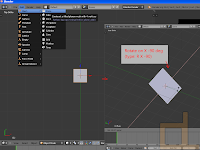
Load your texture in the UV/Image editor section. In the 3D view, add a simple plane: ADD/MESH/PLANE. From this point on, we're going to edit the plane in edit mode. 
Press Tab to enter edit mode.

Let's rotate the plane 90 degrees on the X axis.


To do this precisely, press R, X and then type 90, otherwise just use the 3D rotate manipulator.

After this is done, we'll unwrap the UV of the plane on the texture. Just select all the vertices (with shift you can multi-select), the press U and then Unwrap. Since the plane is really simple, its UV won't be too complicated.


The plane needs to be a little lower on the Z axis, so let's move it. Select all vertices, then press G to grab it. If you press Z after G, the plane will only move on the Z axis. Also, holding down CTRL whilst moving the plane will make it move according to the grid, and shift will slow the movement down. Make it so that the plane is a little under the X and Y axes, so it won't float over the ground.


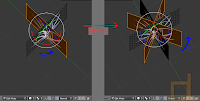
Unless the player has no chance to go near it or look at it from different angles, a single plane doesn't make our grass believable at all, so let's duplicate this plane.
Select it and press Shift + D, then rotate it 90 degrees on the Z axis. You can repeat this step if you want a more detailed patch of grass, and you can even use different masks for each plane.


Now you should subdivide your object, so that it doesn't stay flat and you can change its shape a bit.
Select all, press W and subdivide. After this, you can make adjustments to the UV by moving its vertices (G key).
It's important to note that while Blender uses one-sided faces by default, in the Unreal Engine 3 it's easy to set it to two-sided faces.
You need to add at least one material to the object. You need more if you used more than one masks. In that case, you have to assign a different material to every plane that has a different mask.

The current size of the grass would be tiny in the UDK, so let's make it about 20 times as big. Select all and press S, then type 20. Afterwards you want to adjust the placing because it most likely isn't in the right place.

Now we need to name the object. In 3D view, on the right sidebar, open Item and type in the name (replacing the default name "Plane").
 The only thing left to do in Blender is exporting. Exit edit mode (Tab), then select File>Export, and Autodesk FBX. In the left sidebar, check the "Selected Objects" box, and make sure that only the "Mesh" button is selected underneath. Name the file and export it to the desired location. 

Start the UDK. After closing the Welcome window, look at the Content Browser. In the lower left corner of it, click import. Find your exported FBX file, the mask(s), and the diffuse texture (if you made one), and open them.


If you already have a package, use that, if you don't, create one now and import your files. Grouping is also useful. The UDK is able to import the used textures from the FBX file, but I recommend you import them seperately, because depending on your version, it can cause errors.
The UDK may warn you that the FBX version is outdated, but this doesn't matter with static meshes. After the importing, find your files in the Content Browser, right click on the mask texture, and click "Create New Material". Name it, and after creating, open it.

In the Material Editor, you can see your mask in a box, and you can move the box around by holding CTRL and dragging it. Let's put it beside the Opacity Mask node, and connect the mask's black colored node to the Opacity Mask's node. In the properties section under Material, set Blend Mode from Opaque to Masked, then the Lighting Model to NonDirectional, then check the box below that says "Two Side". We only need a diffuse texture now. Put your own, or your selected one over the mask, and connect its black colored node into the Diffuse node. Save (the green check on the upper left) and close the window.

Let's open our static mesh, in the right sidebar open LODInfo, and look for 0. Elements 0. Material. Switch to the content browser and select the material we just made. Back in the StaticMesh Editor, click the green arrow next to the Material to assign it to the mesh.
If you've done all these steps correctly, the mesh is now complete and usable, you can rotate it with the right mouse button and zoom in and out with the left mouse button.


As the last step, let's drag and drop the static mesh from the Content Browser into the level. Pressing the space bar, you can manipulate the mesh. In the level you can move with WASD and the left and right mouse button.

Of course this is a really basic object. The grass used in our game, for example, is also influenced by the wind. This works based on the material. In the Unreal Engine 3 there are tons of possibilities, and in later posts I'd like to share some of the ones I discovered and learned.

I'm happy to answer any questions in the comment section. I'm also open for any requests you might have.

Have a nice day!